# Back-end
The backend is built on top of NodeJS (opens new window), using expressJS (opens new window) and other cool tools like Sequelize (opens new window) and Docker (opens new window).
Have a multiple integrations with external services like Telegram (opens new window), Slack (opens new window), Discord (opens new window), WhatsApp (opens new window) and Paypal (opens new window).
# Requeriments
- node >= 14
- Docker engine 1.13.0+ (only if you want to use docker, this is optional)
- Postgres SQL >= 9.6
# Setup
First clone the repository
git clone https://github.com/ta-vivo/ta-vivo-api
Now install all the dependencies
yarn
Now you need the environmente file, make a copy of the .env.example file
cp .env.example .env
This environment file contains the variables and values necessary to start the front-end without any further complications.
Now you can run the API
yarn dev
# Setup with Docker
First clone the repository
git clone https://github.com/ta-vivo/ta-vivo-api
Now install all the dependencies
yarn
Now you need the environmente file, make a copy of the .env.example file
cp .env.example .env
💡 Tip: If you want connect to database container, set the env var DATABASE_HOST=host.docker.internal
now you can run docker-compose
docker-compose -f docker-compose.dev.yml up -d
# Environment variables
# Required
The list below is the required environment variables to run the API.
PORT: The port to expose the API.
ENVIRONMENT: This can be development or test or production depend of the environment. for example in development mode, the mail server is disabled.
Database
DATABASE_HOST
DATABASE_PORT
DATABASE_NAME
DATABASE_USER
DATABASE_PASSWORD
Admin user
ADMIN_USERNAME # This is a EMAIL, use a fake email if you want
ADMIN_PASSWORD
TOKEN_KEY: Your JWT secret, generate some strong random key.
# non-required
DOMAIN: If you use traefik as proxy, you can specify some custom domain.
FORCE_SYNC: This is a destructive variable, if this set in true all the tables in the database with some name like any model in the API are dropped.
# Integrations
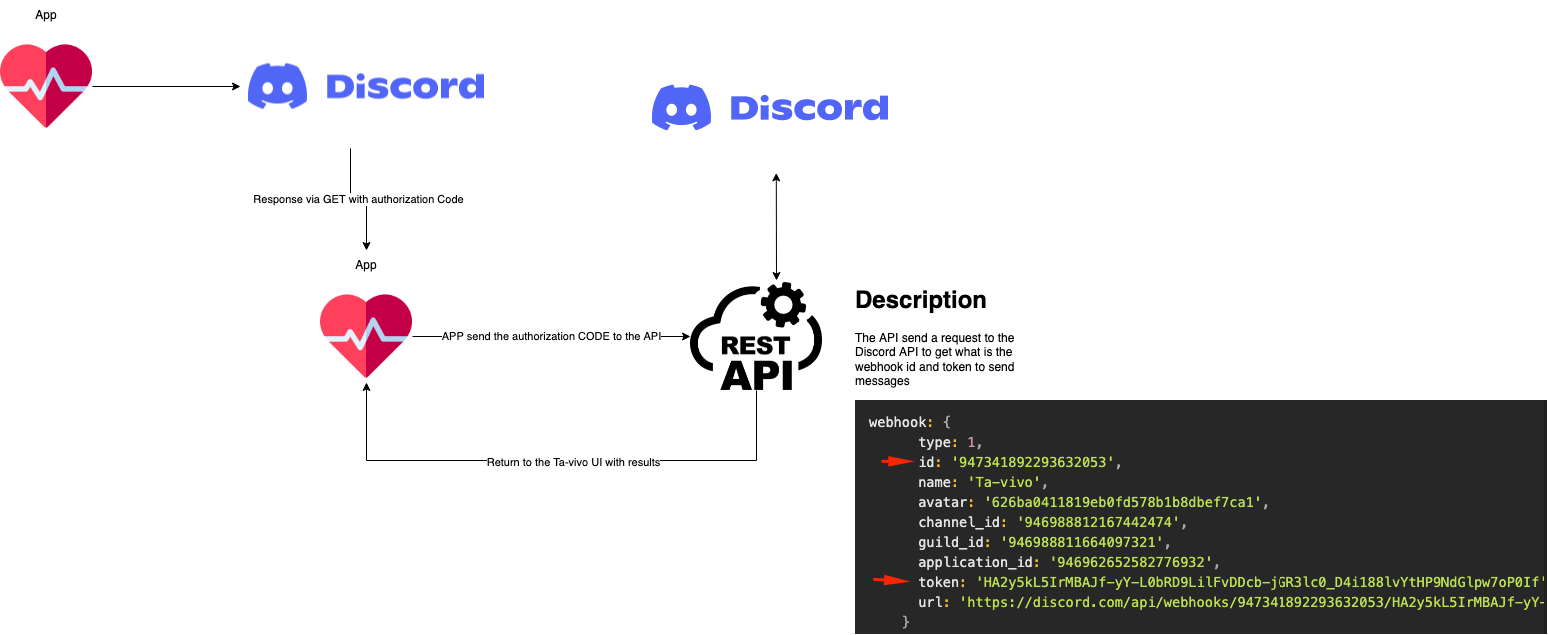
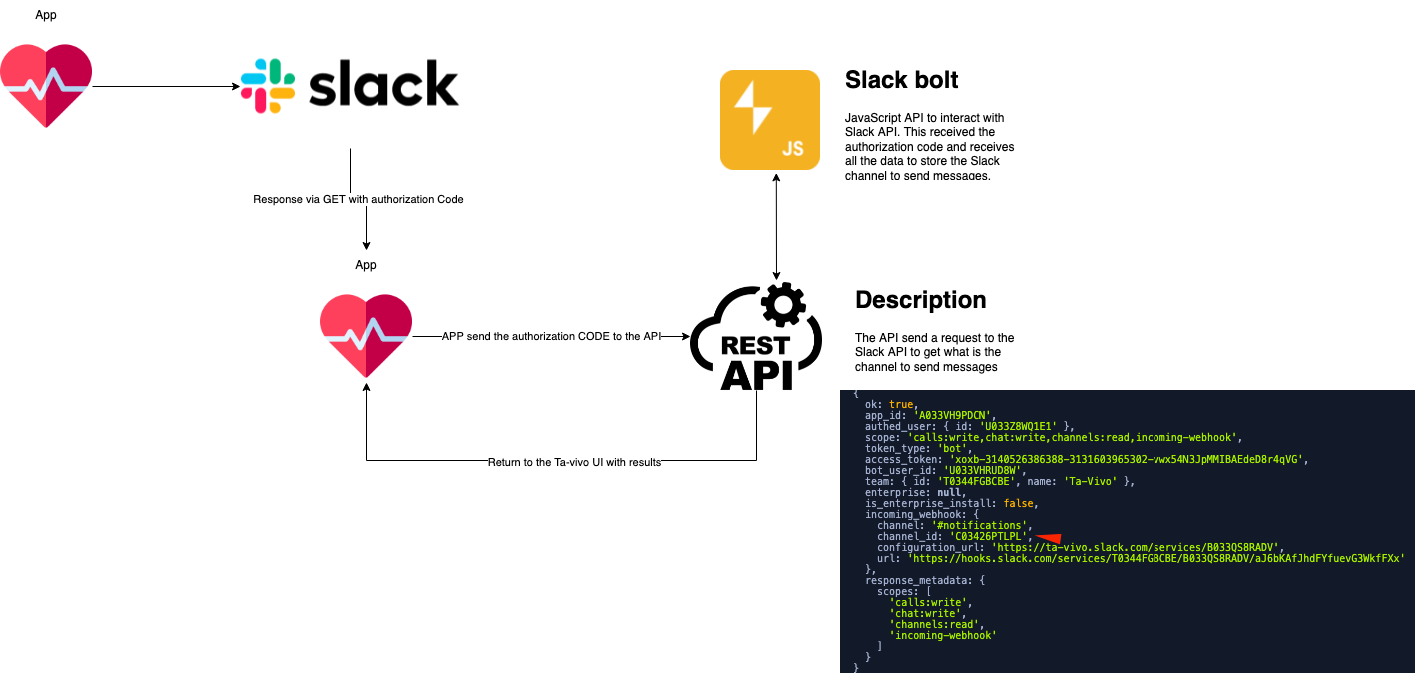
The integrations is a important part of the API, the integrations are the tools that allow the API to send notifications to the users. At this moment we have a few integrations:
# Discord
All the variables below are required if you want to use discord. Follow the documentation https://discordjs.guide/preparations/setting-up-a-bot-application.html#creating-your-bot (opens new window)

DISCORD_CLIENT_ID
DISCORD_CLIENT_SECRET
DISCORD_REDIRECT_URI
All the next variables is required if you want receive notification via email.
MAIL_HOST
MAIL_PORT
MAIL_EMAIL
MAIL_PASSWORD
# Slack
All the variables below are required if you want to use Slack. Follow the documentation https://slack.dev/bolt-js/concepts (opens new window)

SLACK_CLIENT_ID
SLACK_CLIENT_SECRET
SLACK_REDIRECT_URI
SLACK_SIGNING_SECRET
SLACK_BOT_TOKEN
SLACK_BOT_PORT
# Telegram
To use telegram you need to create a bot in your telegram account, you can do it in the telegram bot creator (opens new window).
TELEGRAM_BOT_TOKEN
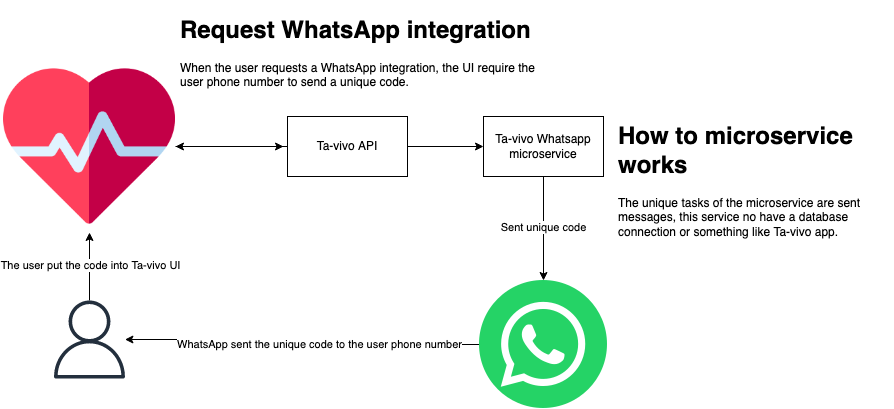
The WhatsApp integration is a microservice that send messages to users via whatsapp. Check the repository here (opens new window)

WHATSAPP_SERVICE_API
WHATSAPP_SERVICE_API_TOKEN
# Paypal
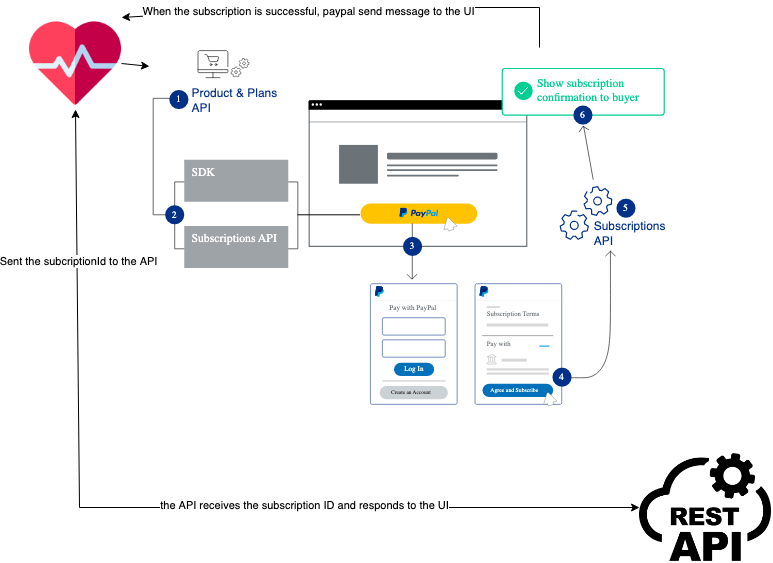
Payment with Paypal, this allow you to pay with paypal, you need to create a paypal account and set the variables below.

PAYPAL_API
PAYPAL_CLIENT_ID
PAYPAL_APP_SECRET
PAYPAL_PRO_SUBSCRIPTION_ID
PAYPAL_ENTERPRISE_SUBSCRIPTION_ID
PAYPAL_ENTERPRISEPLUS_SUBSCRIPTION_ID
# Authentication with social networks
All the documentation is on the official Supabase page, https://supabase.com/docs/guides/auth (opens new window)
At this moment, only the list below is supported.
- Discord https://supabase.com/docs/guides/auth/auth-discord (opens new window)
- Github https://supabase.com/docs/guides/auth/auth-github (opens new window)
- Google https://supabase.com/docs/guides/auth/auth-google (opens new window)
- Slack https://supabase.com/docs/guides/auth/auth-slack (opens new window)
SUPABASE_PROJECT_URL
SUPABASE_ANON_PUBLIC_KEY
# Authorization headers
The users can use a custom Authorization header, this is useful when the API requiere an authorization header and you don't want to use the default Authorization header.
All the tokens is encrypted with the crypto standar library of nodejs, the encryption is made with the aes-256-ctr algorithm, and the token never comeback to the client.
Example:
const crypto = require('crypto');

const algorithm = 'aes-256-ctr';
const secretKey = 'theSecretKey';

const encrypt = (text) => {

  const iv = crypto.randomBytes(16);

  const cipher = crypto.createCipheriv(algorithm, secretKey, iv);

  const encrypted = Buffer.concat([cipher.update(text), cipher.final()]);

  return {
    iv: iv.toString('hex'),
    content: encrypted.toString('hex')
  };
};

const decrypt = (hash) => {

  const decipher = crypto.createDecipheriv(algorithm, secretKey, Buffer.from(hash.iv, 'hex'));

  const decrpyted = Buffer.concat([decipher.update(Buffer.from(hash.content, 'hex')), decipher.final()]);

  return decrpyted.toString();
};

const text = 'eyJhbGciOiJIUzI1NiIsInR5cCI6IkpXVCJ9.eyJzdWIiOiIxMjM0NTY3ODkwIiwibmFtZSI6IkpvaG4gRG9lIiwiaWF0IjoxNTE2MjM5MDIyfQ.SflKxwRJSMeKKF2QT4fwpMeJf36POk6yJV_adQssw5c';
const encrypted = encrypt(text);
console.log('🚀 ~ file: Untitled-1 ~ line 31 ~ encrypted', encrypted);
const decrypted = decrypt(encrypted);
console.log('🚀 ~ file: Untitled-1 ~ line 32 ~ decrypted', decrypted);